


Sharon has 21+ years of experience as a qualified Emergency Care Nurse registered with the Australian Health Practitioner Regulation Agency (APHRA) and 12+ years as a First Aid Trainer.
She takes pride in FirstAidPro making first aid training available, comprehensive and affordable to everybody.
Learning how to perform CPR with rescue breaths, or Cardiopulmonary Resuscitation, is a life-saving technique used in emergencies where someone’s heart has stopped beating or they’ve stopped breathing. It’s a critical skill that can make the difference between life and death, especially when performed correctly and promptly. Incorporating rescue breathing into CPR can significantly improve the chances of survival by ensuring oxygen reaches the brain and other vital organs. In Australia, CPR guidelines are set by the Australian Resuscitation Council (ARC), ensuring best practices are followed.
What is CPR with Rescue Breaths?
CPR combines chest compressions and rescue breathing to maintain circulation and oxygenation during cardiac arrest or respiratory failure. While chest compressions are vital for keeping blood flowing, rescue breathing adds the critical component of oxygen delivery, which is particularly important in cases such as drowning, paediatric emergencies, or overdose.
Rescue breathing involves breathing air into the victim’s lungs, restoring oxygen levels until their natural breathing resumes or emergency responders take over. In Australia, guidelines emphasise the importance of rescue breathing in scenarios where oxygen deprivation is the primary cause of the incident.
Step-by-Step Guide to CPR with Rescue Breathing
Following these systematic steps for cpr with rescue breaths can help save a life in an emergency situation.
Step 1 – Assess the Situation and Ensure Safety
Before approaching the victim, check the surroundings for potential hazards. This includes looking for dangers such as live wires, traffic, fire, or other threats. Your safety is paramount—if you become injured, you cannot assist the victim. Once the scene is safe, approach the person.
Step 2 – Check for a Response
Gently shake the person’s shoulders and call out, “Are you okay?” If there is no response, it’s time to act. Call triple zero (000) or ask someone nearby to do so. Make sure to specify the nature of the emergency and your location.
Step 3 – Send for Help
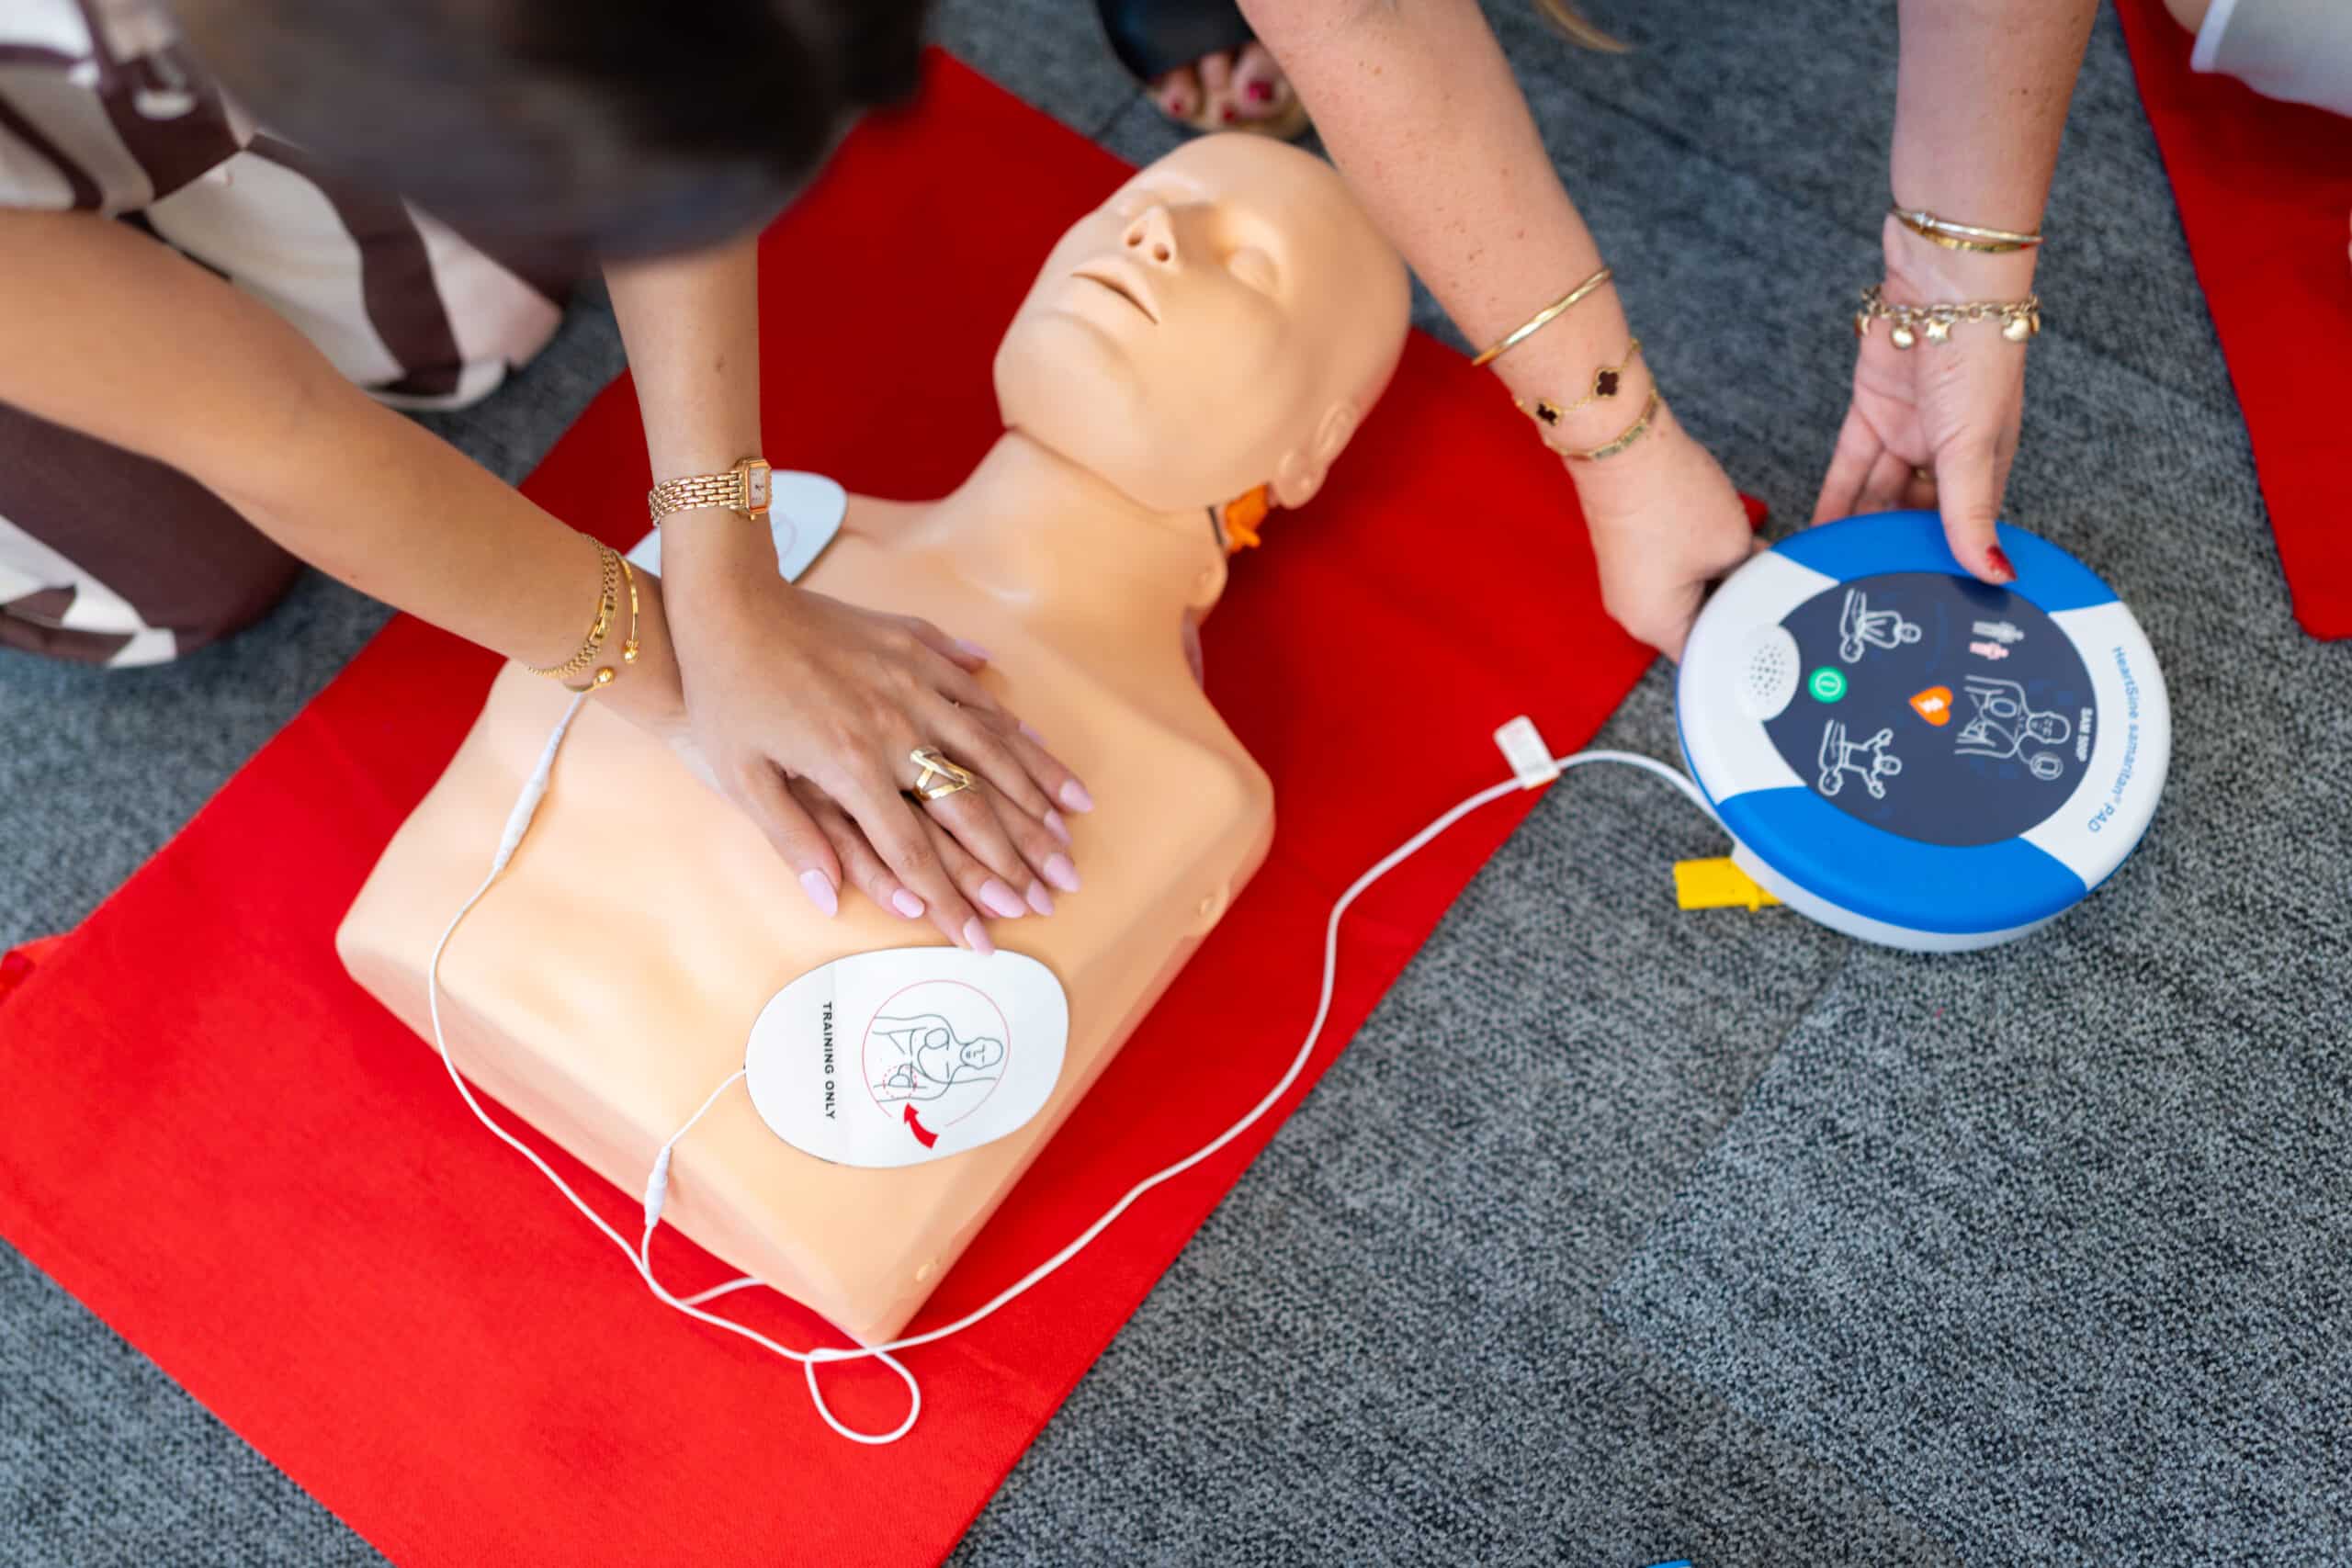
If you haven’t already done so, immediately call emergency services (000 in Australia) or delegate this task to a bystander. Be clear about your location and the situation. If possible, also ask someone to locate an AED (Automated External Defibrillator) if one is available nearby. Time is critical in cardiac emergencies, so getting professional help on the way should be your first priority after ensuring scene safety.
Step 4 – Open the Airway
Place one hand on the person’s forehead and two fingers under their chin. Gently tilt the head back and lift the chin. This manoeuvre helps open the airway, especially if the tongue has blocked it.
Step 5 – Check for Breathing
Position your face close to the victim’s mouth and nose. Look for chest movement, listen for breath sounds, and feel for air movement on your cheek for up to 10 seconds. If the person is not breathing or is only gasping, begin CPR immediately.
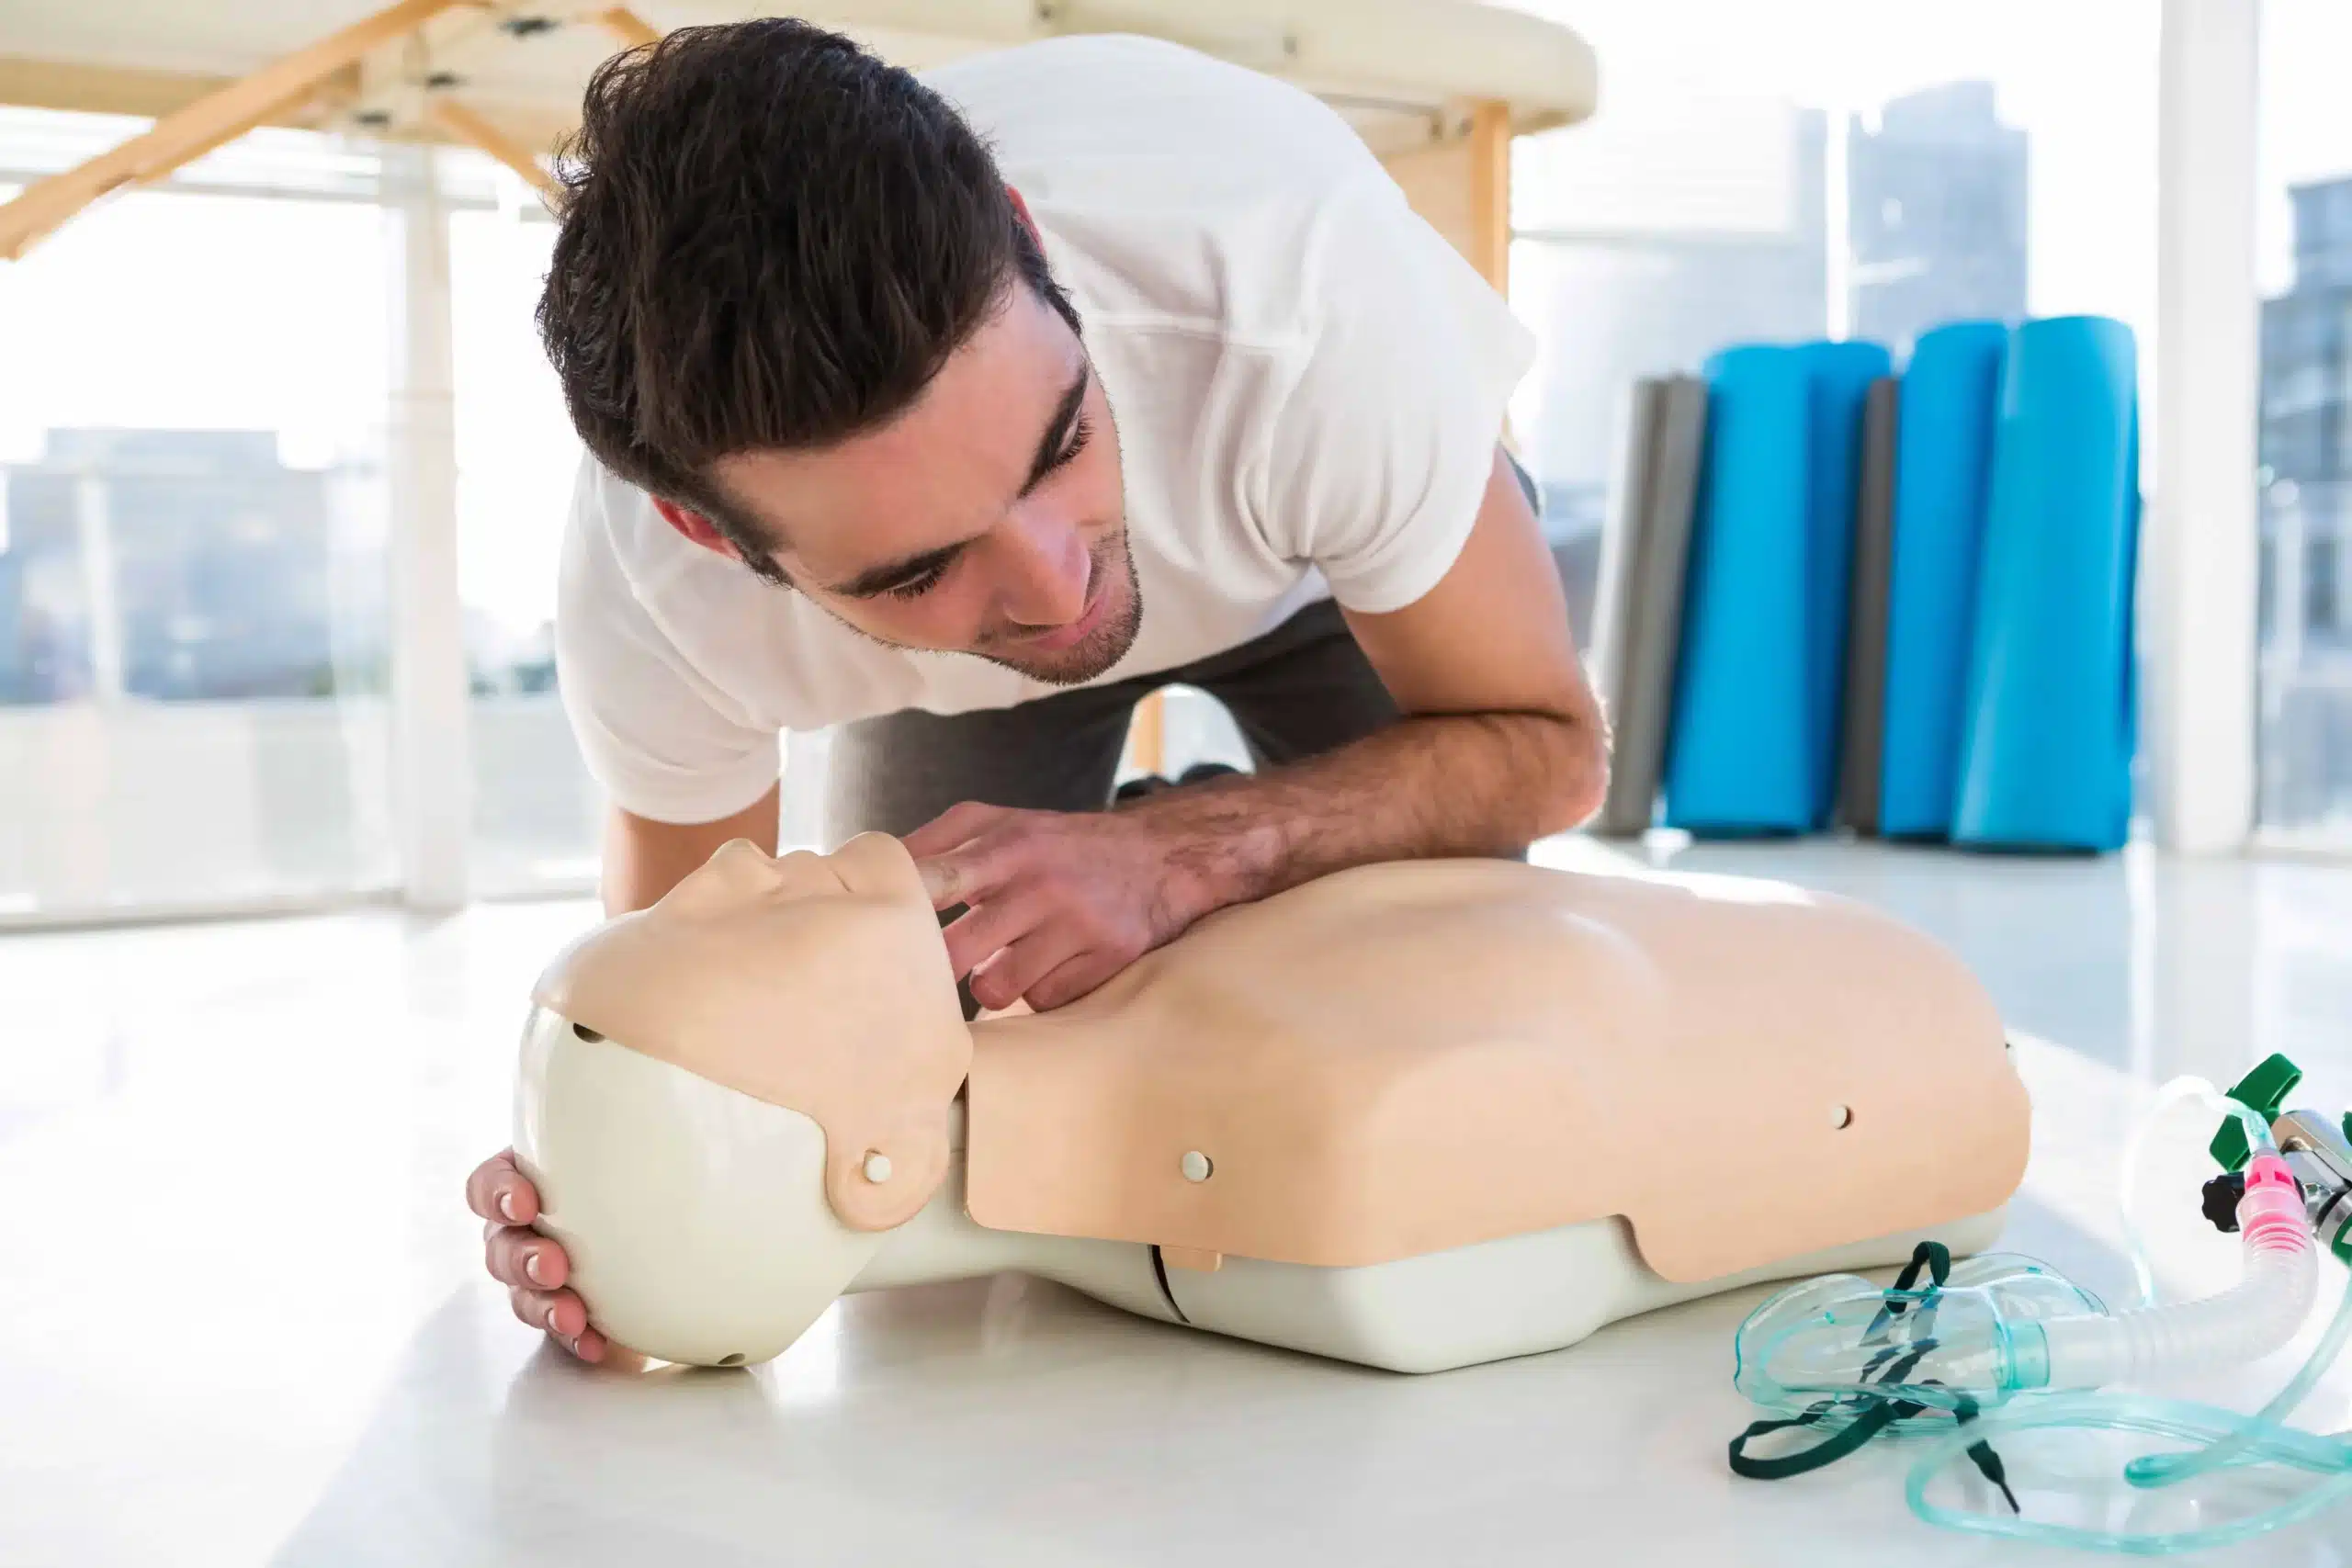
Step 6 – Start CPR with Chest Compressions
Position your hands in the centre of the chest on the lower half of the sternum. Use the heel of one hand, place the other hand on top, and interlock your fingers. Press down hard and fast at a rate of 100 to 120 compressions per minute, aiming for a depth of 5–6 cm in adults. Ensure the chest fully recoils between compressions to allow the heart to refill with blood.
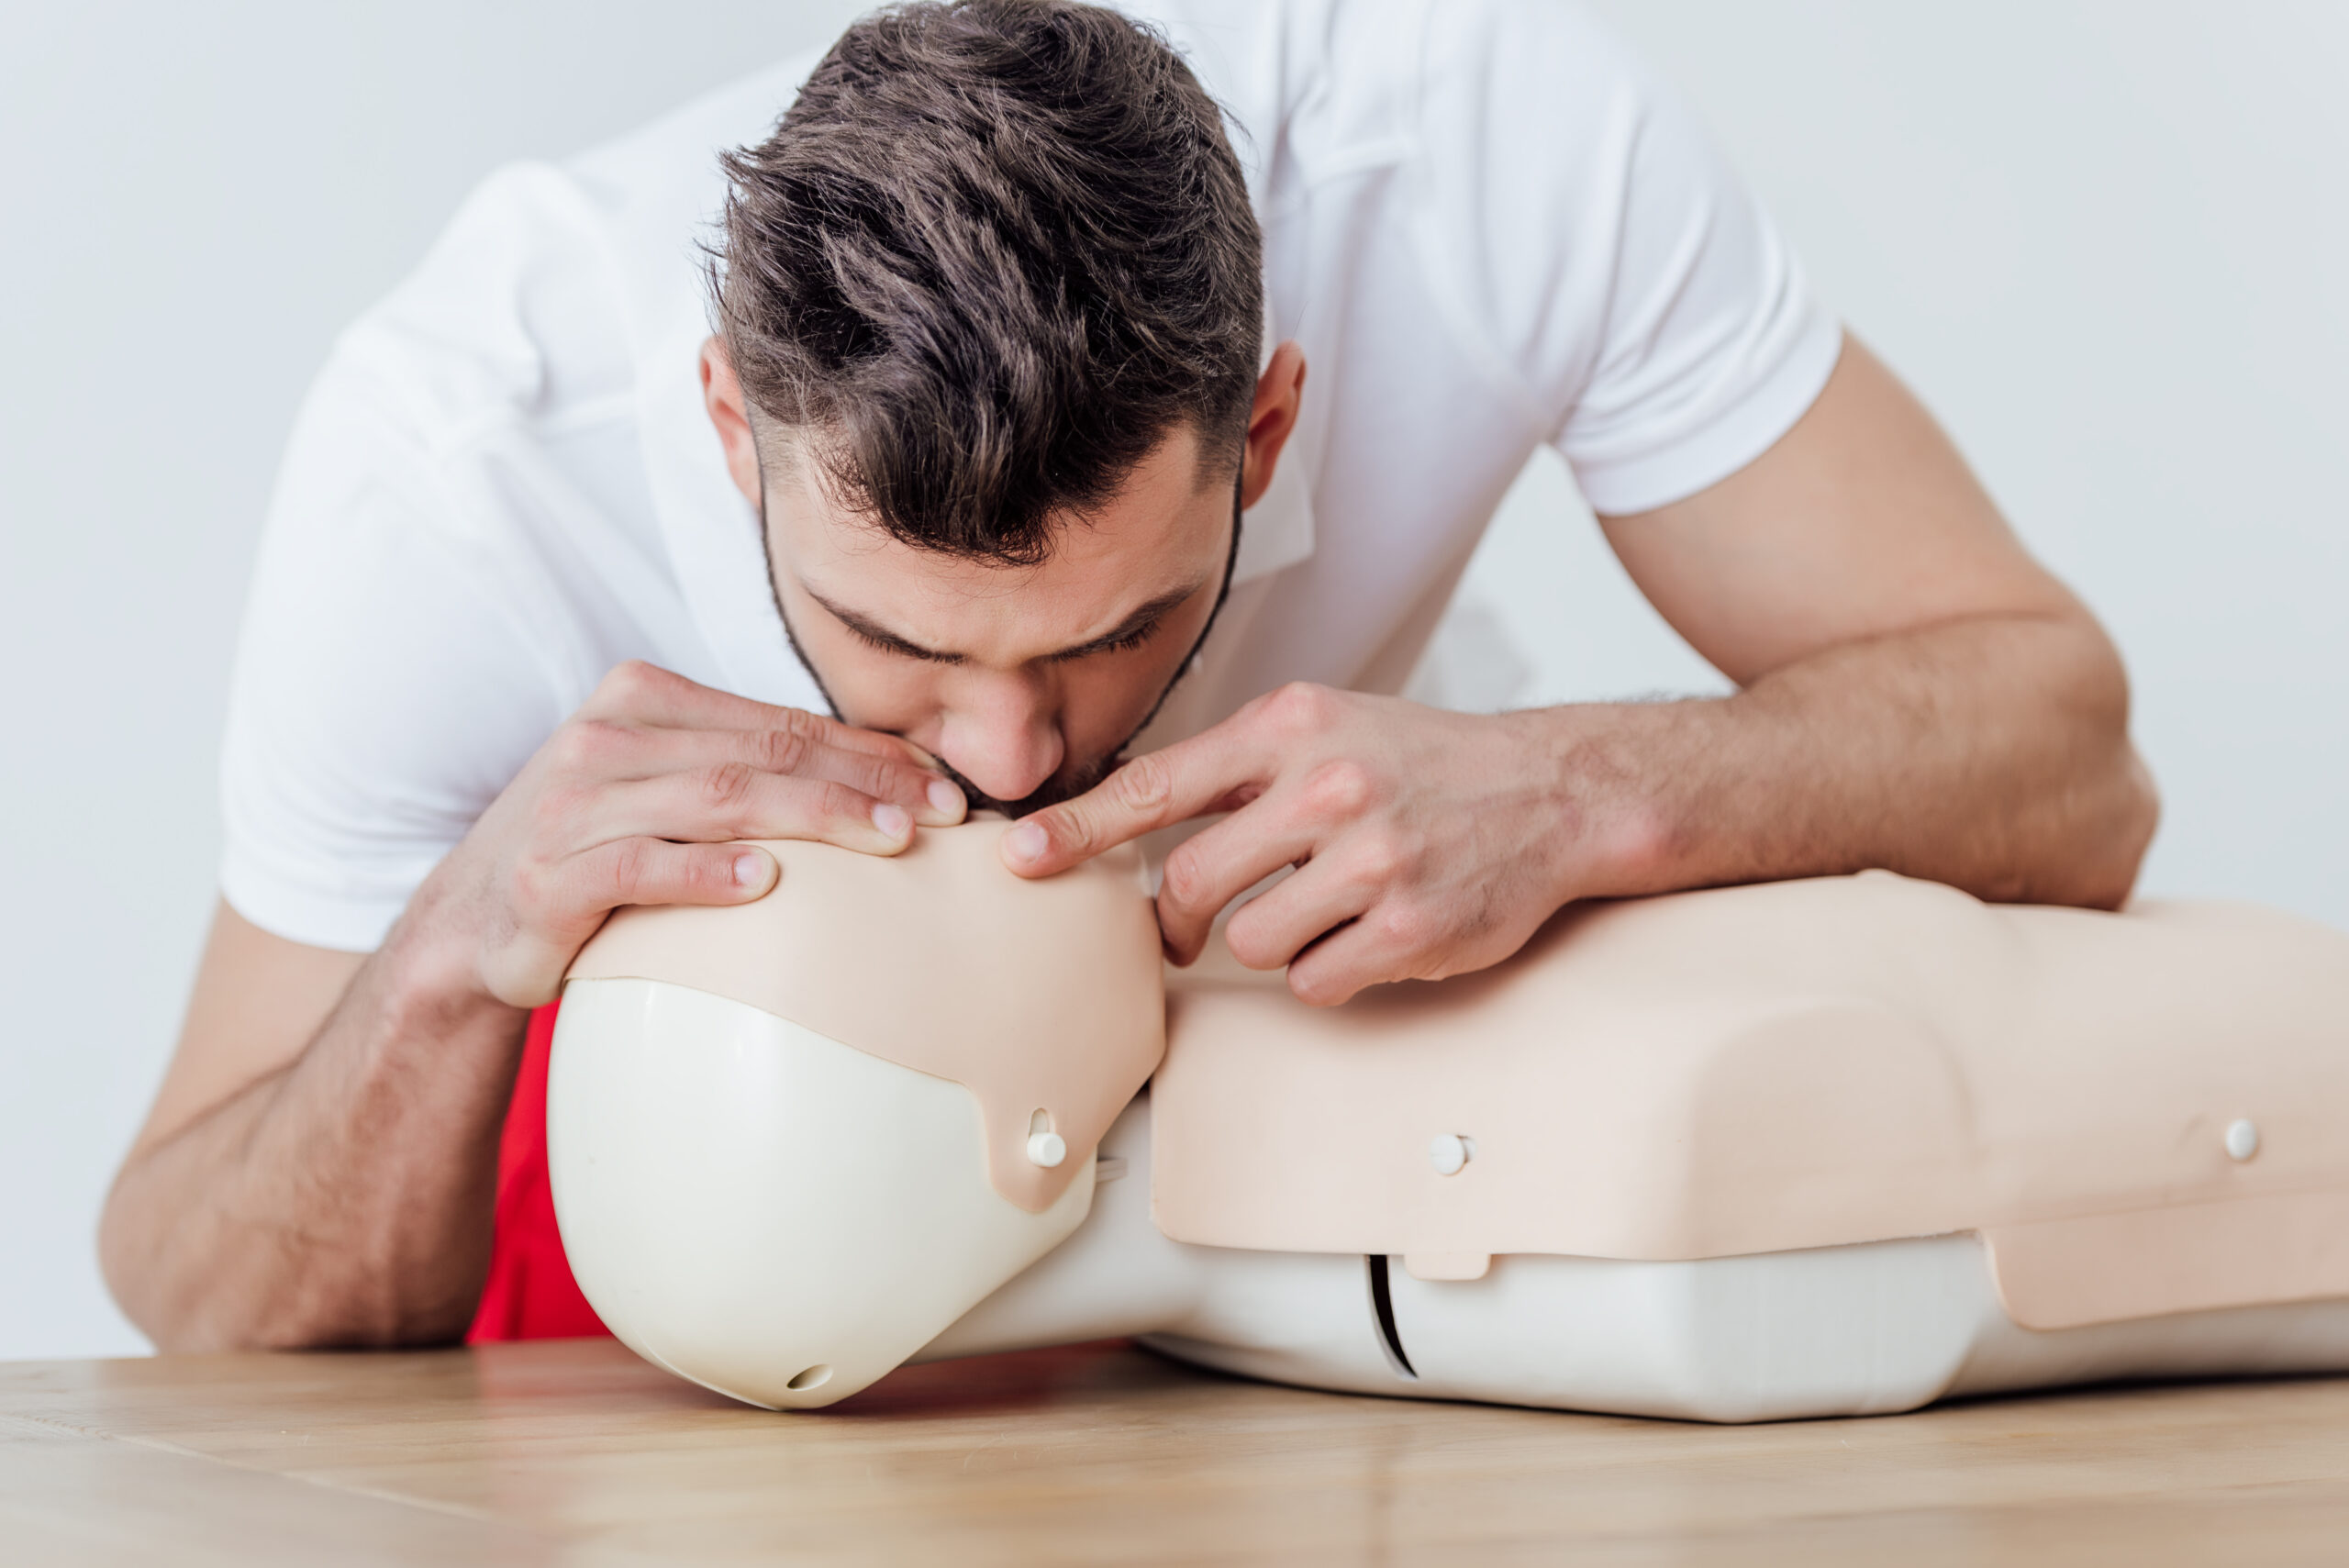
Step 7 – Give Rescue Breaths
After 30 chest compressions, provide two rescue breaths. Pinch the victim’s nose, seal their mouth with yours, and blow steadily for about one second per breath. Ensure the chest visibly rises with each breath. If you don’t observe chest rise, recheck the airway and adjust the head tilt.
Step 8 – Continue CPR Cycles
Repeat the basic life support cycles of 30 compressions and 2 breaths until:
- Emergency medical help arrives and takes over.
- The victim shows signs of life, such as breathing normally or movement.
- You are too exhausted to continue.
- Use an AED (automated external defibrillator) if one is available

Special Considerations for CPR with Rescue Breathing
Certain situations require modified approaches when performing cpr with rescue breaths to ensure the best possible outcomes.
CPR for Drowning Victims
In drowning cases, rescue breathing is especially critical as the primary issue is oxygen deprivation. Begin with rescue breaths before starting chest compressions. Providing oxygen early can significantly improve survival rates.
CPR for Infants and Children
Infants and children require modified CPR techniques:
- For infants (under 1 year): Use two fingers for chest compressions and a gentle puff of air for rescue breaths.
- For children (1–8 years): Use one hand for compressions and ensure the breaths are not as forceful as for adult CPR.
Using a Pocket Mask or Barrier Device
Using a pocket mask or face shield can protect both the rescuer and the victim. Ensure a tight seal over the victim’s mouth and nose, and use the one-way valve to deliver breaths.
Dealing with Vomit or Airway Obstruction
If the victim vomits, roll them onto their side to clear the airway before resuming CPR. If the airway is obstructed, perform chest compressions to try to dislodge the blockage rather than abdominal thrusts.
FAQs
What's the ratio of chest compressions to rescue breaths in CPR?
When performing cpr with rescue breaths, the standard ratio is 30 chest compressions followed by 2 rescue breaths. This cycle should be repeated continuously until emergency services arrive or the person shows signs of life. This 30:2 ratio applies to adult CPR and is
Can I perform CPR without giving rescue breaths?
Yes, hands-only CPR (continuous chest compressions without rescue breaths) is still effective and better than no CPR at all. However, CPR with rescue breaths is particularly important in cases of drowning, drug overdose, or paediatric emergencies where oxygen deprivation is the primary issue. If you’re trained and comfortable with rescue breathing, it provides the best outcomes.
How do I know if my rescue breaths are effective?
When performing cpr with rescue breaths, you should see the victim’s chest rise visibly with each breath you give. If the chest doesn’t rise, reposition the head by tilting it back further and lifting the chin, then try again. Make sure you’re creating a good seal around the mouth and that the nose is properly pinched closed. Each breath should take about one second to deliver.